Getting started
Installing the plugin
The 3ds Max 2 MaxWhere Exporter plugin can be downloaded here. The downloaded 1.63.zip can be installed by copying the necessary plugin files into the corresponding folders, as described in the following paragraphs.
Locate the installation folder of Autodesk 3ds Max 2020 on your computer.
Close your 3ds Max if it is running.
Extract the 1.63.zip into a folder of your choosing. Copy all the extracted contents (the Plugins folder as well as the .dll files in the root of the extracted zip) from the folder into the root of the installation folder of 3ds Max.
After starting 3ds Max, the success of the installation of the plugin can be checked using the Plug-in Manager where it will be found under the name of MAX2MW.DLE.
Right now the addon is only tested for 3ds Max 2020.
Creating, exporting, and testing your first MaxWhere space
This section will show you the step-by-step process of creating your first MaxWhere 3D environment in 3ds Max, as well as exporting and testing it in MaxWhere, by a very simple example.
- For advanced mesh preparation for MaxWhere see Meshes;
- For material preparation see Texture maps and material settings;
- For information about exporting lights to MaxWhere see Lights;
- For information about exporting cameras to MaxWhere see Cameras
- For restricting camera movements in the MaxWhere 3d environment see Camera bounds
- For detailed export settings see Export options
Creating the 3ds Max scene to be exported
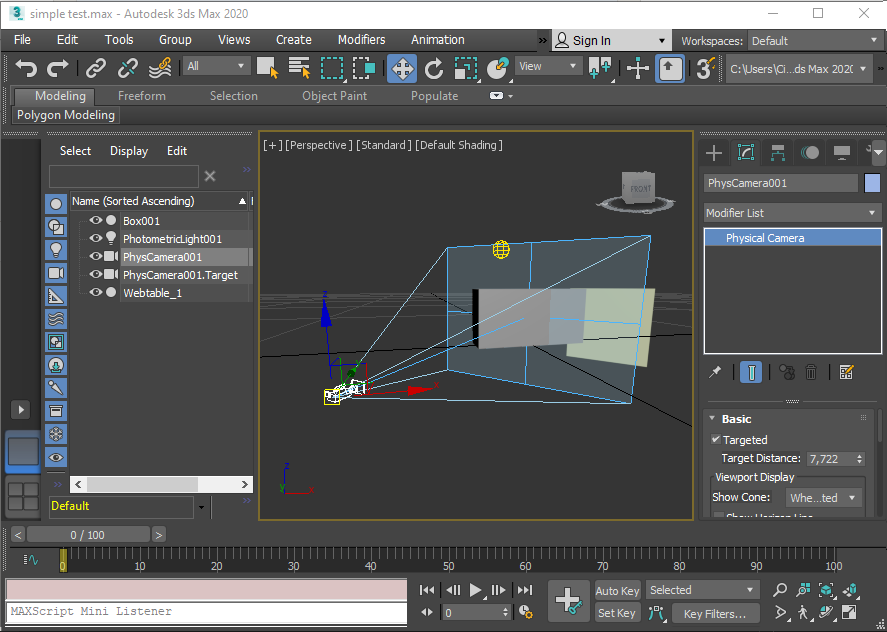
Let us create a new file in 3ds Max. In a new default 3ds Max file created without the use of any templates, the Scene explorer contains no objects.
Add a new Box primitive to the scene. Place it to (0,0,0), with dimensions 1.0×4.0×2.0. Do not set any materials.
Add a physical camera to the scene. Set its target to the center of the Box primitive.
Add a free light to the scene. Leave its settings on default.
Add a Plane primitive to the scene. Place it to (6,3,0). Rotate it around the Z-axis 45°. Rename it to Webtable_1.
Exporting the 3ds Max scene
For saving your 3ds Max scene as a MaxWhere 3d environment select File->Export->Export... and set the type to MxW scene (*.JSX).
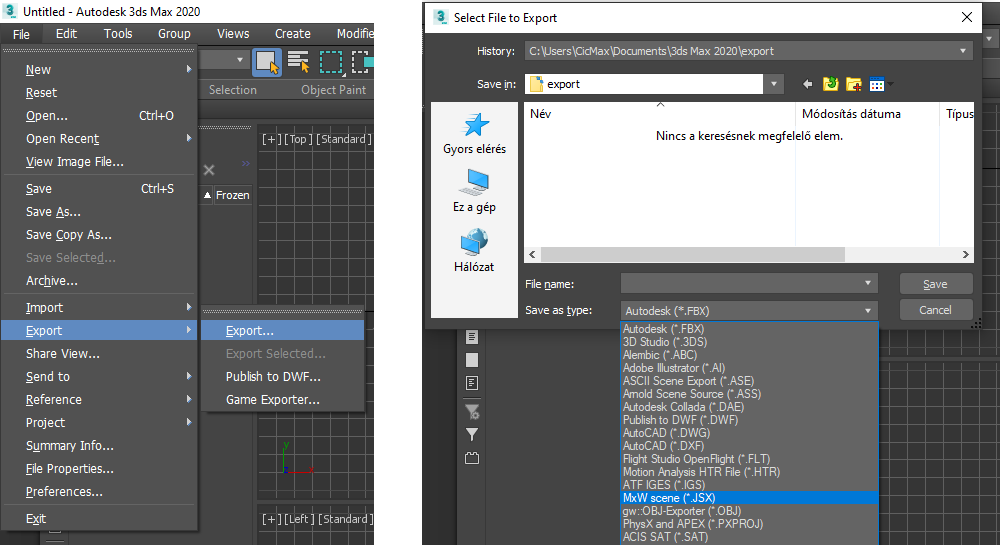
Choose a name and location to save your MaxWhere 3d environment. In this example, we choose the name simple_test. Press Save. A dialog panel titled "MaxWhere export v 1.4" will appear. Default settings fit most cases, as well as our example, so just press OK.
The exported simple_test folder has the following structure:
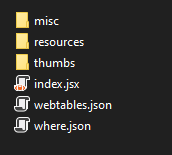
The exported mesh elements, textures, etc. are in the resources folder. If you find a failed_mesh.txt in the resources folder containing one or more mesh object names, please refer to Troubleshooting mesh export.
Loading the result into MaxWhere
The resulting folder can be loaded into MaxWhere for debugging.
If you have access to the MW-AddContextMenu.exe tool, after installing it right-click on the exported folder and choose the Open with MaxWhere option. Otherwise start MaxWhere, in the 3d browser press Shift+Ctrl+Alt+D and choose the exported folder to load.
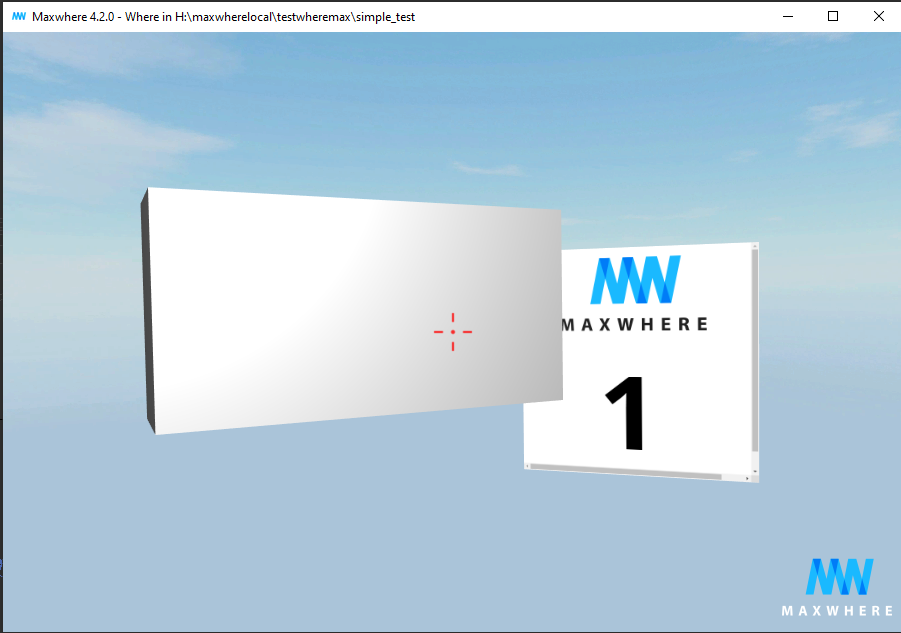
The exported scene - Where space - is opened in MaxWhere. You can see the exported Box object and the webtable; the latter shows a placeholder home page.